WordPress Themes Documentation
Template Installation
If you don't want to spend your time installing the template, don't hesitate to order installation service using our live-chat.
Cherry Framework is built as a WordPress theme, so you need to have WordPress engine installed first. If you have not installed it yet, please refer to the Engine Installation section.
To fully appreciate the Cherry Framework power we highly recommend to use Cherry Framework based theme. It can be both premium or free.
Cherry Framework theme installation has never been this quick and easy. The installation process includes 3 steps only: Cherry Framework installation, child theme installation, sample data installation.
All installation steps can be completed through the WordPress dashboard, which speeds up the whole process.
You can verify this by clicking on the link below:

There are two ways to install the theme:
Automatic installation using Cherry Wizard
Cherry Wizard is a plugin developed to provide easy Cherry Framework themes installation to our customers.
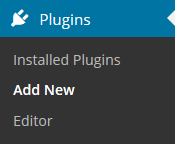
- Log into the WordPress dashboard.
- Open the Plugins tab.
- Click Add new.
- Click the "Upload Plugin" button.
- Download Cherry Wizard.
- Upload the downloaded zip archive to the WordPress admin panel and click the "Install" button.
When the installation is done, activate the plugin in the Plugins section.

Click Activate under the "Cherry Wizard" plugin. Click Begin installation in the popup notification box.
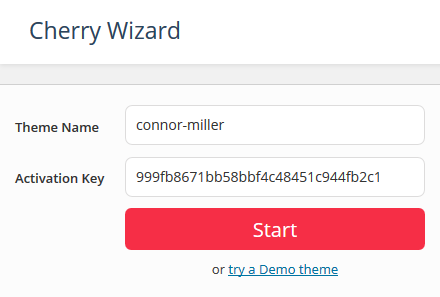
- Enter the name of the theme in the Theme Name field.
- Enter the activation key in the Activation key field.
- If you did not purchase the theme, you can choose try a Demo theme to get a clear picture of the product.
Downloading and installing framework and plugins
Cherry Wizard will automatically install all the required plugins. In case there are incompatibilities with server recommended settings, you will see the following notification:
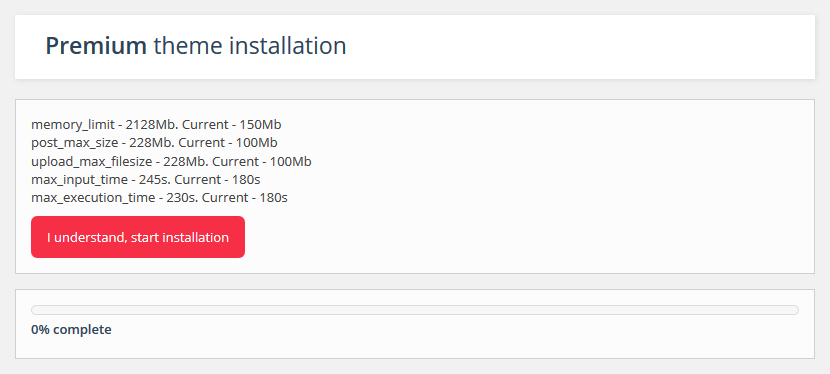
This message shows your current hosting server settings and recommended ones. Please contact your hosting to make your server compatible with Cherry Plugins.
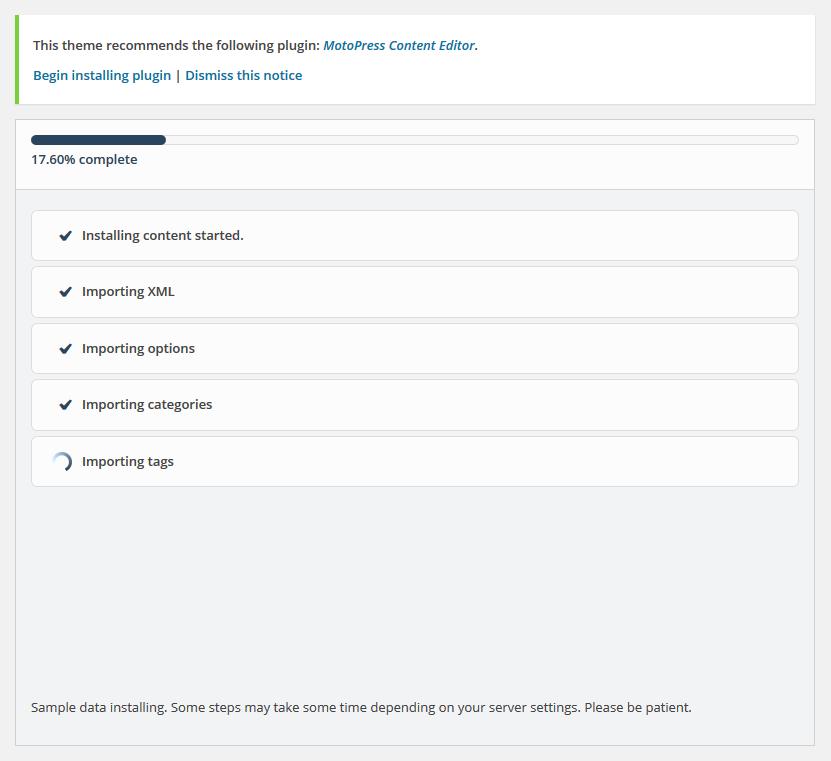
You can check the installation details of each plugin and component during the installation process.
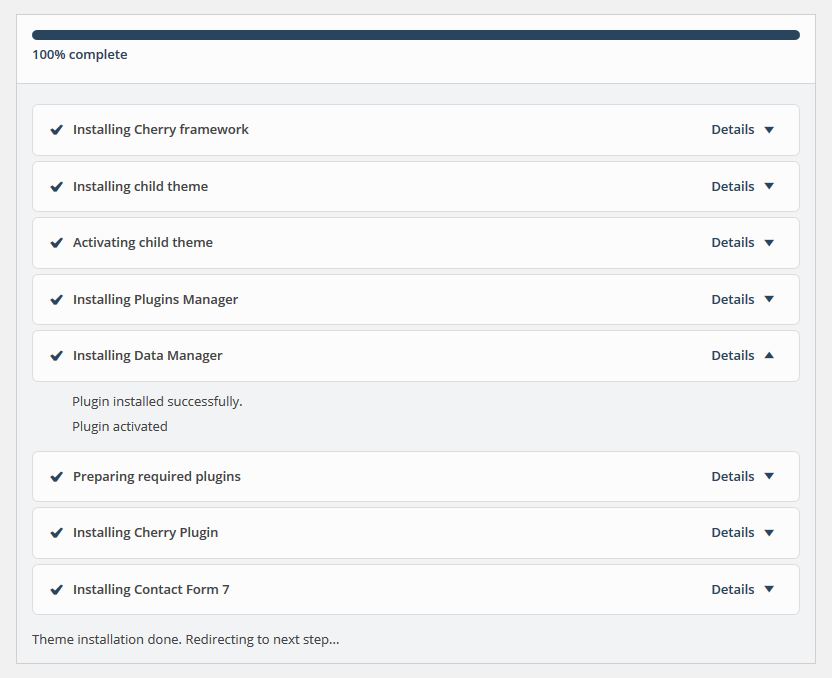
When the installation is complete, you will be automatically redirected to the next step.
Downloading and installing the theme files
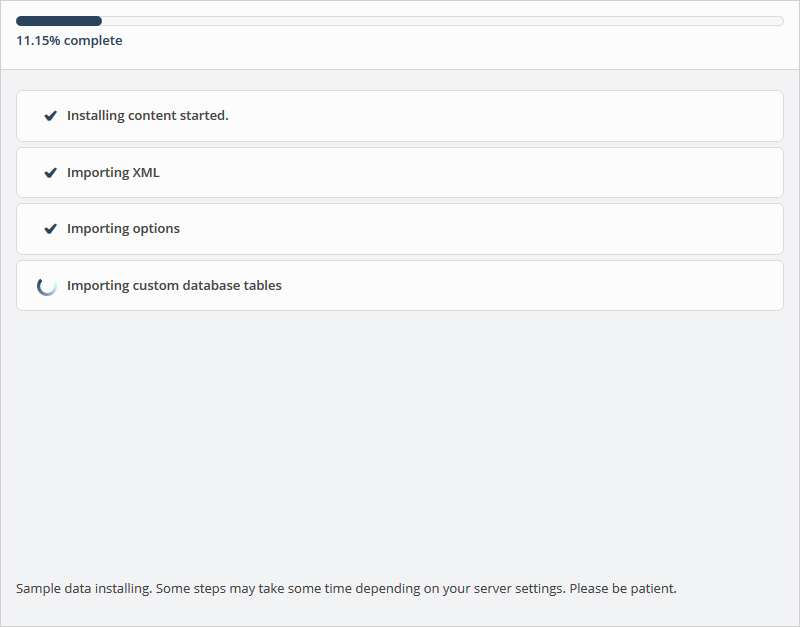
The next step is the sample data installation. Sample data is a set of demo content that will make your theme appear as on the preview page. It can be installed from the cloud, local computer or you can skip this step.
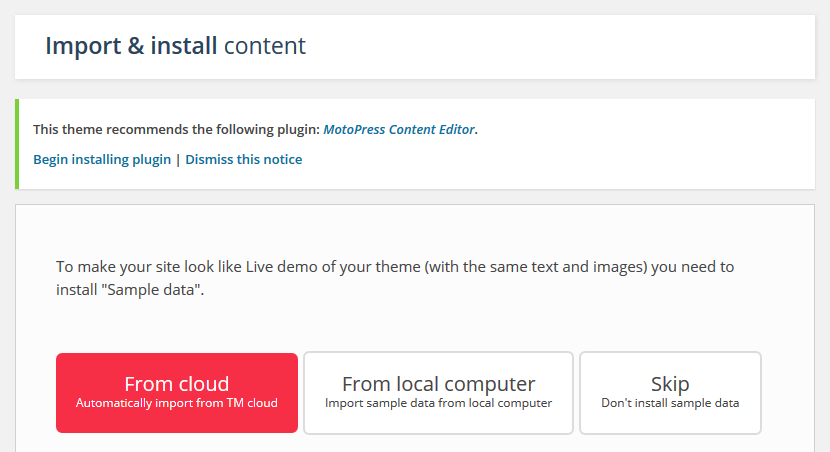
If you choose installation from cloud, the installation process will begin.
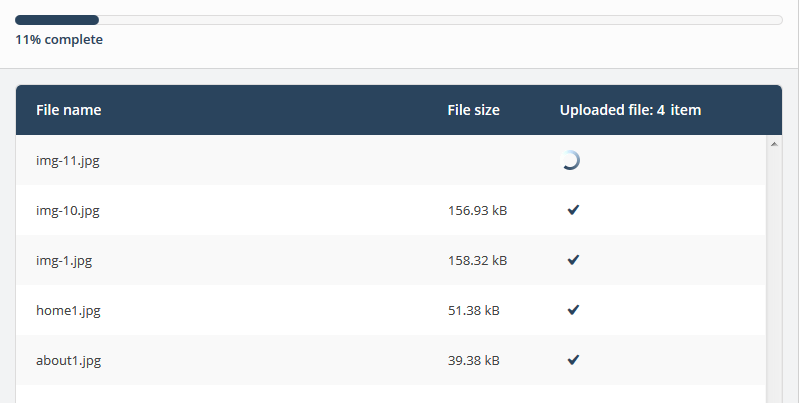
Once all media files are downloaded, you will proceed to installing database files.

WordPress installation
Download the required WordPress version. You can check which release is required on the template preview page in the requirements list. Make sure you've downloaded the correct version.
You can download the WordPress platform at the official WordPress.org website: Download WordPress . If you need another release, follow this link: WordPress versions archive . Once the platform is downloaded, you'll need to unpack the files. You can use any tool for extracting ZIP files.
These tutorials will show you how to unpack archived file, if you have Windows OS (using WinZip) and if you have MAC OS (using StuffitExpander) .
- Unpacking archive (MAC OS)
- Unpacking archive (Windows OS)
- How to download and install WinZip
- How to unpack the template (MAC OS)
- How to unpack the template (Windows OS)
Once WordPress platform files and folders are unpacked, you need to upload them to the hosting server.
Upload files and folders to the server into the PUBLIC_HTML or WWW directory.
You can also take a look at these tutorials that contain detailed information on how to upload files to a hosting server:
Next, you need to create a database for the WordPress platform.
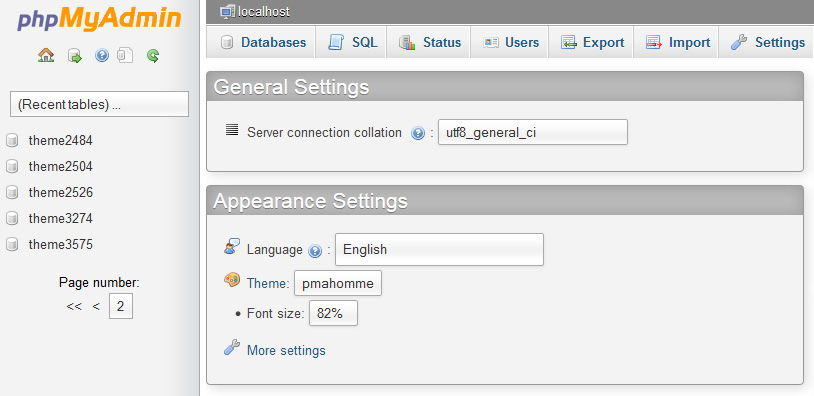
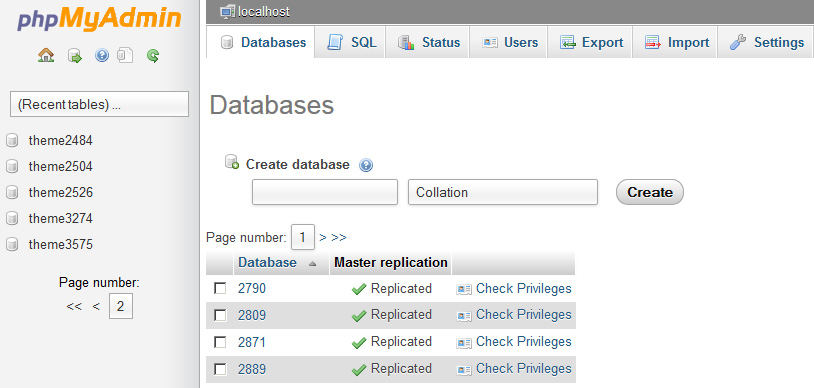
You can create it using the database management tool in the hosting cpanel (usually it is PhpMyAdmin). With the help of phpMyAdmin you can create a new database in 3 simple steps (check the slides below):
-
Click the Database button at the top navigation menu to see the list of databases.
-
Enter database name in the "Create new database" field.
-
Click the "Create" "button.
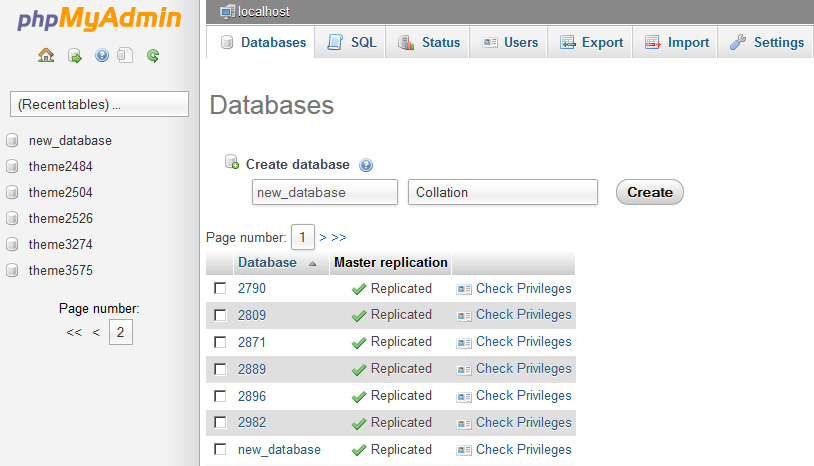
You will see the new database in the list now. Click on its name to access it.
If you face any difficulties while creating the database, contact your hosting provider for tech support.
You can also check the following tutorials:
Enter the WordPress directory path into the browser address bar and click Enter. WordPress installation will begin.
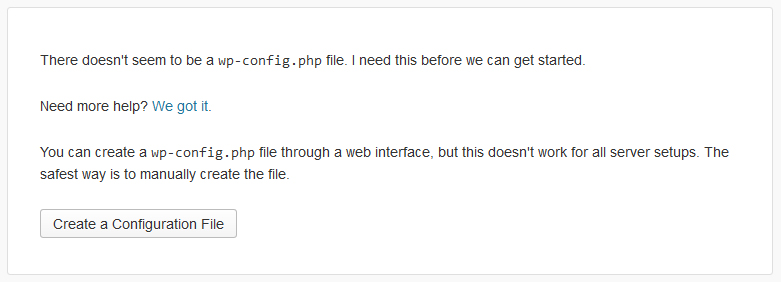
Creating the configuration file
WordPress installation screen will inform you that you are missing the configuration file. Click "Create Configuration File" to create it.
Database details.
You need to enter the WordPress database connection details here.
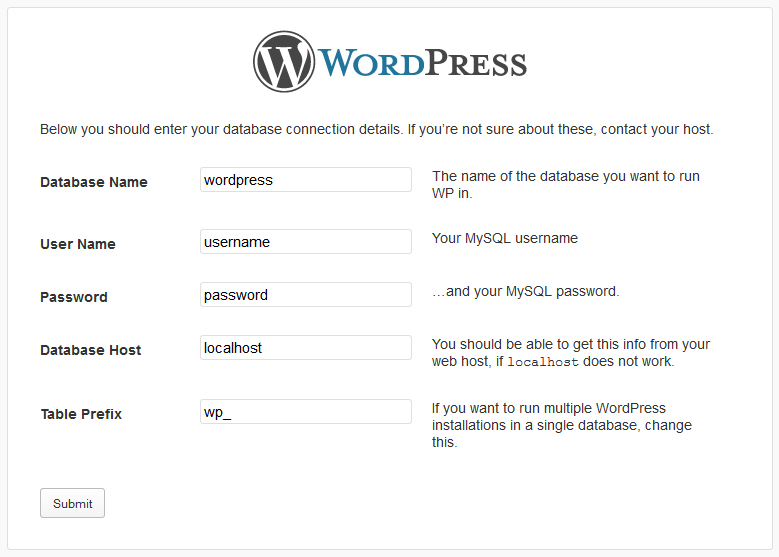
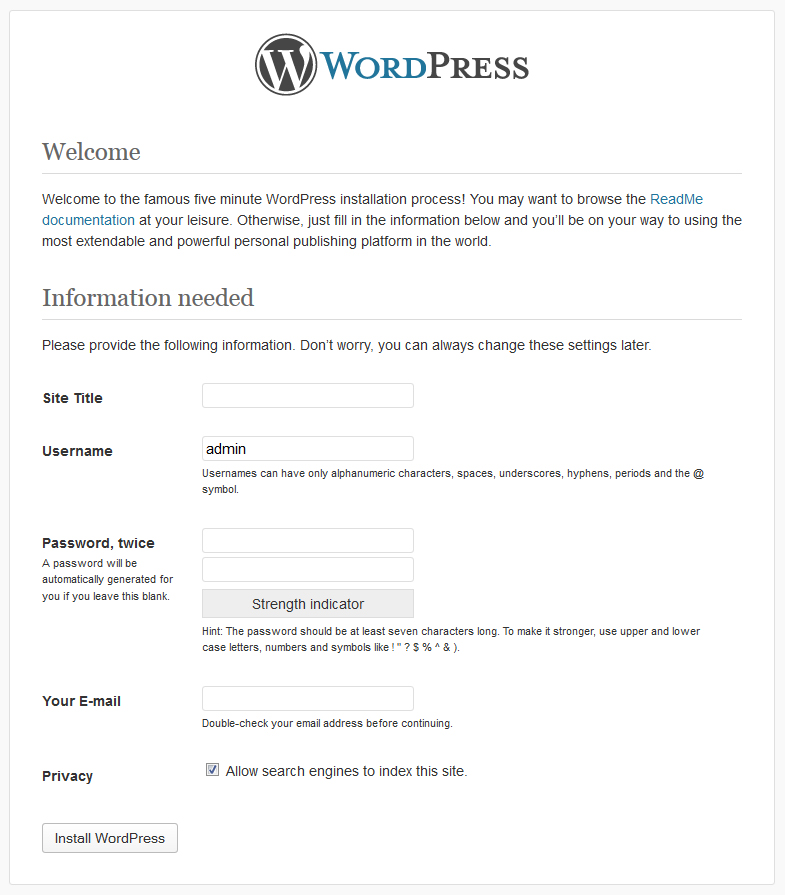
Website details.
You need to enter the next details:
- website name
- administrator login and password
- website e-mail
Click "Install WordPress."
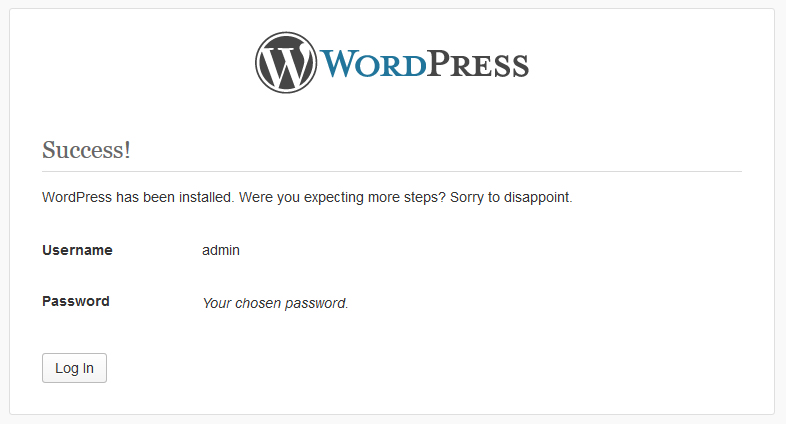
If you have entered the correct details, you will see a message about successful installation and the WordPress dashboard access button.
You can also take a look at these video tutorials:
- How to install WordPress engine to HostGator (manual installation)
- How to install WordPress engine to Bluehost (manual installation)
- How to install WordPress engine to SiteGround (manual installation)
- How to install WordPress engine to GoDaddy (manual installation)
- How to install JustHost engine to Bluehost (manual installation)
Manual Installation
If you don't want to spend your time installing the template, don't hesitate to order installation service using our live-chat.
If for some reason installation using Cherry Wizard is not an option, you can install Cherry Framework and the theme manually.
Install Cherry Framework
- Download Cherry Framework 4 .
- Open the WordPress admin panel and go to the "Appearance -> Themes" section.
- Click the "Add new" button and click "Upload theme."
- Upload the Cherry Framework 4 package.
Install Cherry Theme
- Download the theme using the link on the template delivery page. Check your email account for template delivery email.
- Open the WordPress admin panel and go to "Appearance -> Themes."
- Upload the Cherry theme package.
- Activate Cherry theme.
If you have difficulties installing the theme through the WordPress admin panel, you can upload it through the FTP File Manager.
- Unpack the CherryFramework.zip archive and theme####.zip archive on your local computer (right-click each .zip file, choose Unzip to: CherryFramework and theme####, after that you will see 2 folders: CherryFramework and theme####).
- Upload the CherryFramework and theme### folders into the /wp-content/themes/ directory on the FTP server.
- Log into the WordPress dashboard (add /wp-admin after the domain name in the browser address bar).
- Click Appearance > Themes .
- Then click Available Themes, find theme#### and activate it clicking the Activate button.
Install Cherry Plugins
To make a Cherry based website fully functional, you need to install all the required plugins. Plugins provide additional functionality to the default WordPress engine.
- Under Appearance -> Themes you will see a warning saying that your theme requires certain plugins to be installed for its proper working. Click on Begin Installing Plugins.
- Check all the plugins and select Install in the drop-down menu. Click Apply.
- Wait until the installation is complete.
- Activate the plugins.
To install Cherry Plugins manually, please do the following:
- Download all the required plugins. You can find them here.
- Open the WordPress admin panel.
- Go to "Plugins > Add New."
- Click the "Upload Plugin" button.
- Search for plugins in your downloaded template package in the "source" directory.
- When you have all plugins uploaded, you need to activate them.
- Go to the Plugins section and click the Activate links under each plugin.
Install Sample Data
To make your theme appear as on the template live demo, please install the sample data. You can do this using Data Manager tool or manually.
Data Manager
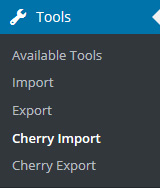
Download and install Data Manager plugin. Install Open WordPress admin panel and go to "Tools > Cherry Import" section
Open your downloaded template package and go to "theme\sample_data\" directory. All files from this directory should be uploaded to Cherry Import. You can select all files (CTRL+A) and drag them to the Cherry Import section or click "Browse local files" in Cherry Import.
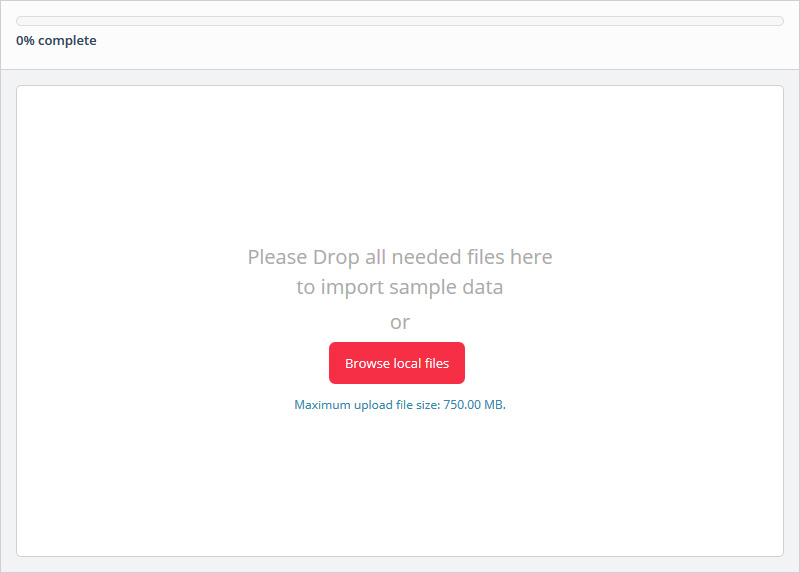
If all files are uploaded, you'll be able to Continue Installation.

Please note: .json and .xml files are required for correct sample data installation.
Click "Continue Install" button to proceed.
When the installation process is done, you can view your website. It should be as on the live demo.
Sample Data Manual Installation
- Copy the "uploads" folder (you can find it in the theme/manual_install/ template folder) into the /wp-content/ folder on the FTP server.
- Open the theme####.sql file (located in the theme/manual_install/ folder) using any code editor (Recommended software: Dreamweaver or Notepad) and change all lines with "your_website_url_here" to your website URL via Find and Replace (hot keys - Ctrl+H). E.g.: http://www.mywebsite.com
- There should be no forward slash "/" at the end of the URL.
- Save the changes and close the file.
- Now you can import this file through phpMyAdmin or another database management tool.
Congratulations, now you have completely installed the Cherry Theme.
How to update Cherry Framework and Cherry Plugins
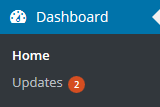
When new version of Cherry Framework is available you'll see a notification in your WordPress admin panel in "Dashboard -> Updates" section.
Click on 'updates' menu item to see what components can be updated. Just click on any element you want to update and proceed. The update process is exactly the same as WordPress core update.
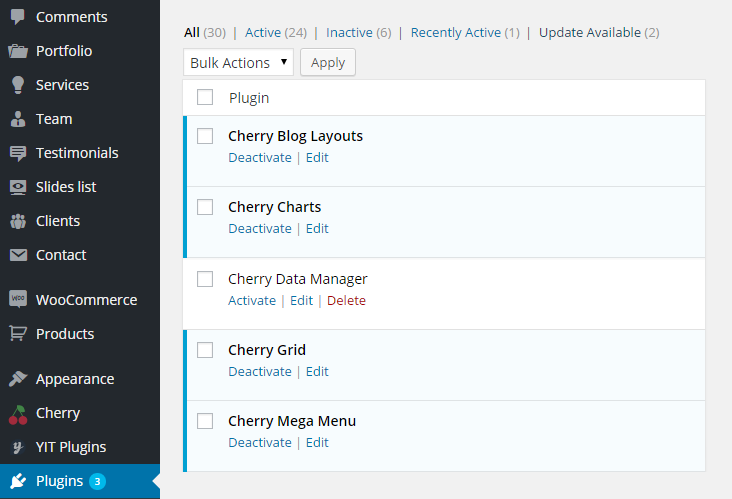
Plugins, that have updates available can also be seen in "Plugins -> Update Available" section.
Click "Update Now" button to download plugin updates.