Magento documentation
Third-party Extensions Settings
Olark Live Chat
You need to register on the official website in order to use on-line chat built in the template, fill in all the required information and receive the code Olark Site-ID.
-
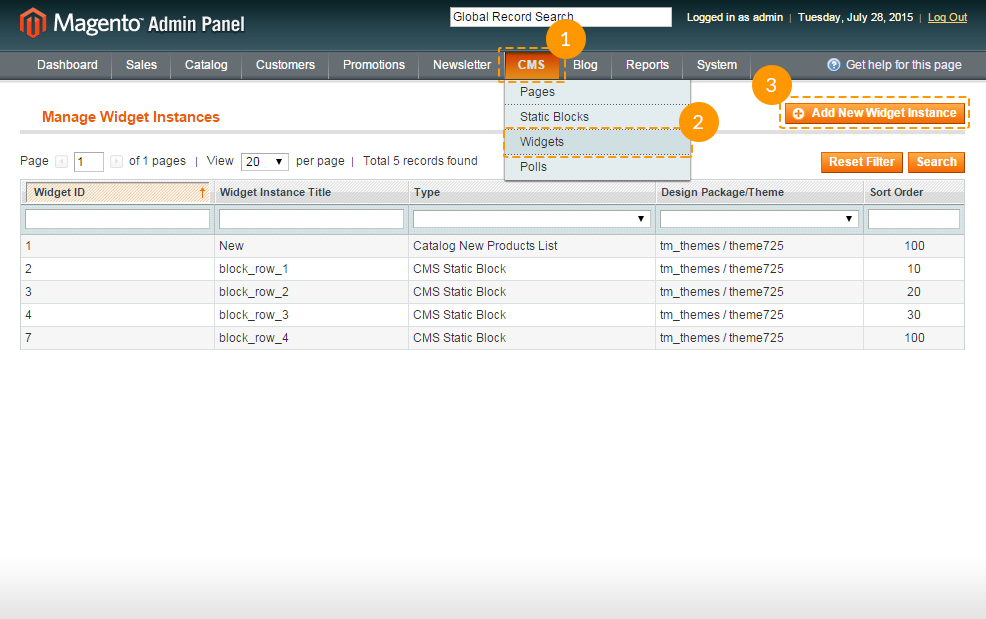
Open Magento admin panel. Navigate to the CMS menu item and click it, in the drop-down menu navigate to the Widgets item.
Once the new page is opened, click the Add new widget instance button.
-
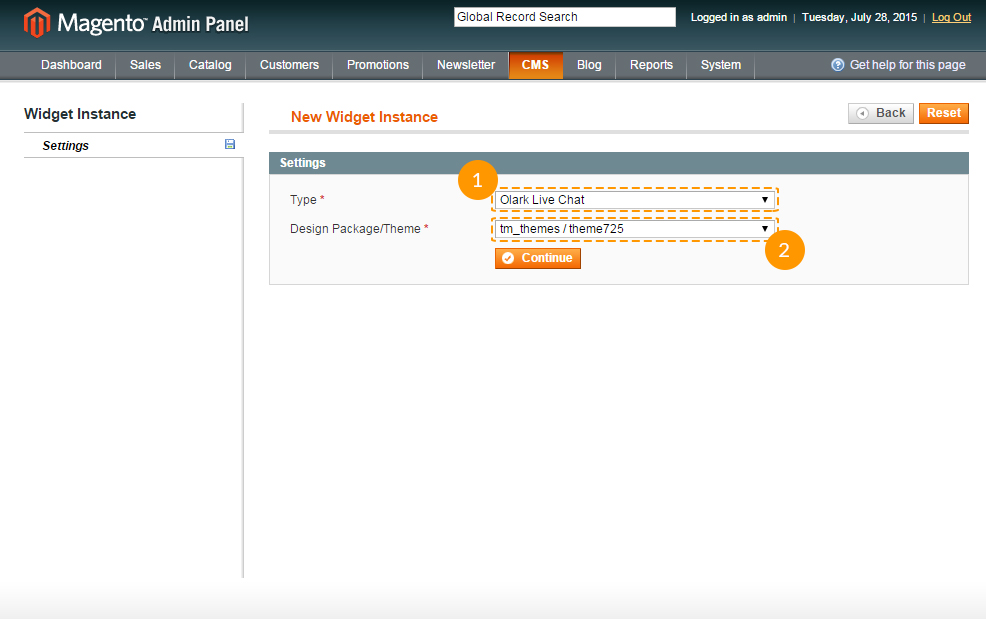
In the drop-down menu Type select the Olark Live Chat, in the menu Design Package/Theme select your store skin to display the chat. Click the Continue button.
-
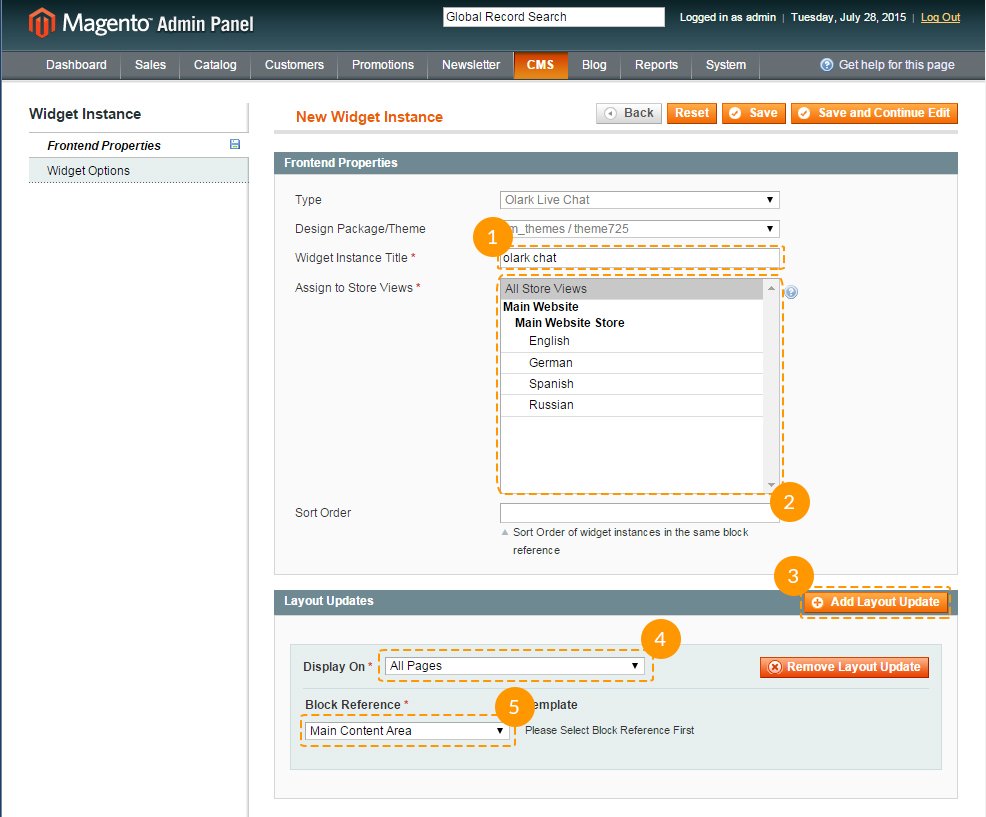
Now you need to configure the display of the on-line chat. As a first step, in the field Widget Instance Title type in the name of the widget, which will be displayed in the admin panel. In the field Assign to Store Views you need to select the store view, which will display the chat. In the block Layout Updates click the Add Layout Update button. In the field Display On you have to select All pages. For the field Block Reference select the Main Content Area.
-
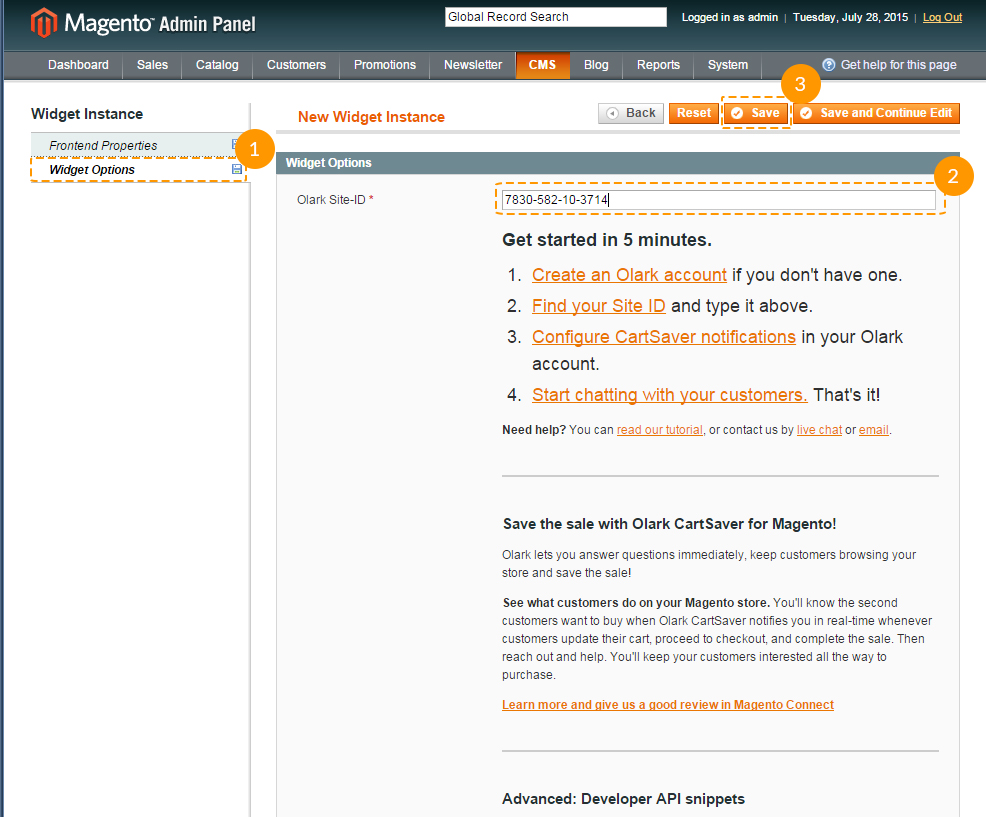
Follow the link Widget Options in the left sidebar. On the right side you will see the field in which you need to insert the Olark Site-ID.
Once your Olark Site-ID is filled in, click the Save button.
-
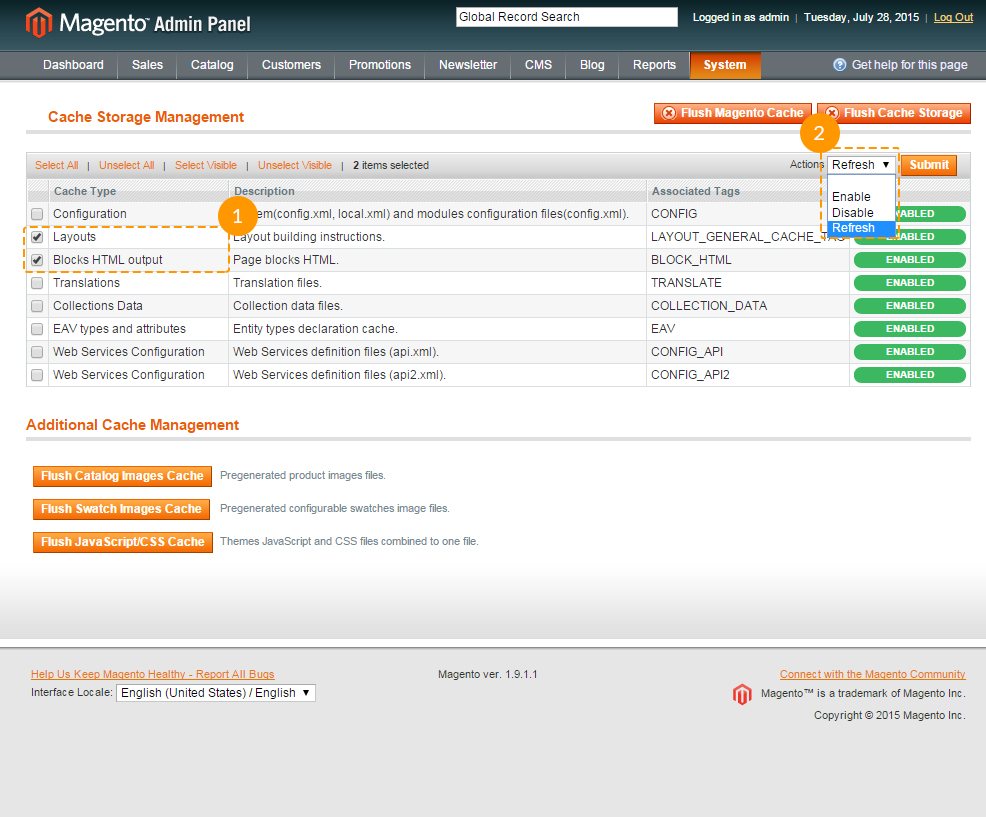
In the new window navigate to System -> Cache Management menu item. In the block Cache Storage Management check Layouts and Blocks HTML output items. Make sure, that in the field Actions the Refresh item is selected, and click Submit.
All done! Now you can visit your website and see the widget for the on-line chat.
You can also take a look at the following instructions:
Add This
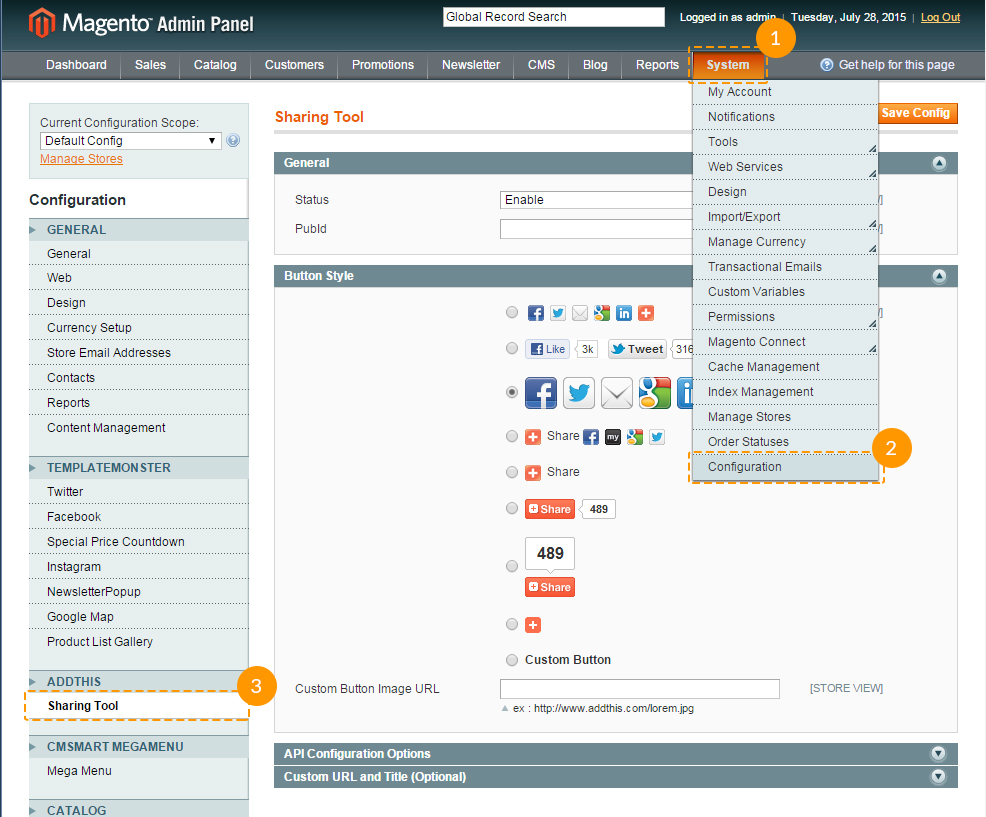
The Sharing Tool settings allows you to choose how the icons are displayed. The recommended settings are shown in the picture.
Blog
There is an opportunity to add Blog(AHEADWORKS EXTENSIONS) to your website.
-
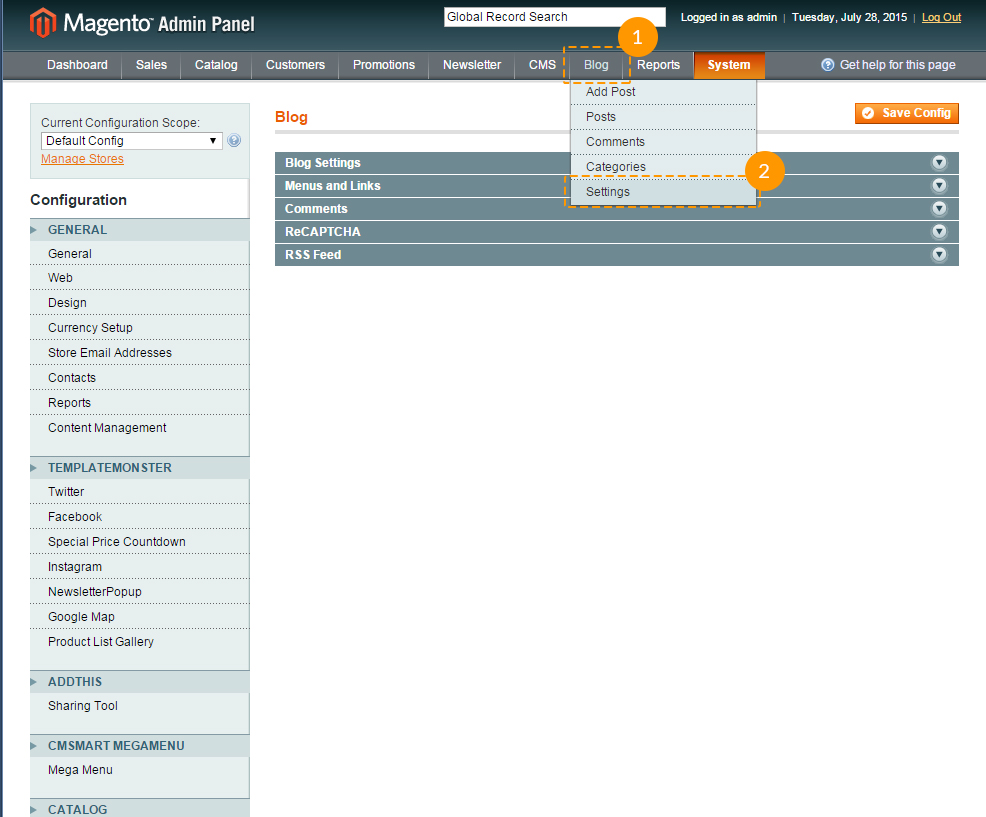
Blog settings can be found in Blog > Settings, or System > Configuration > AHEADWORKS EXTENSIONS > Blog.
-
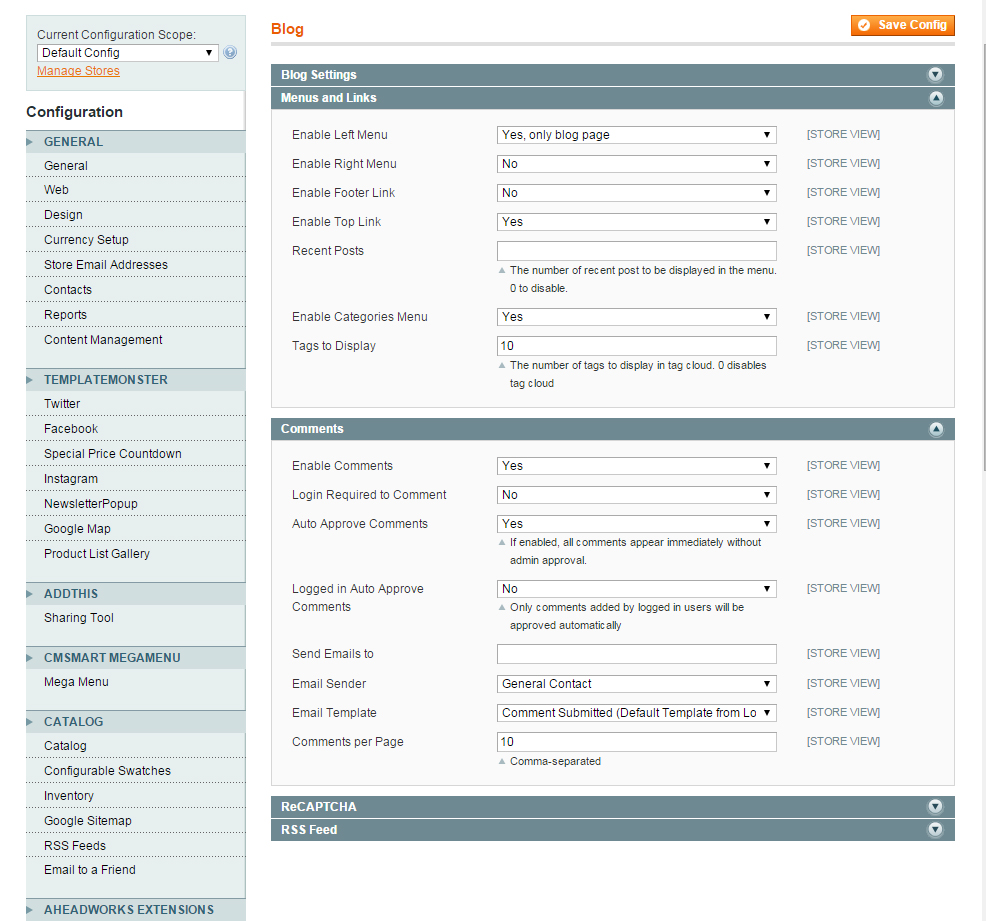
The first tab Blog > Settings, includes blog basic settings.

-
The rest of the tabs allow to configure: record type, date display, comments display, captcha and newsfeed enabling.
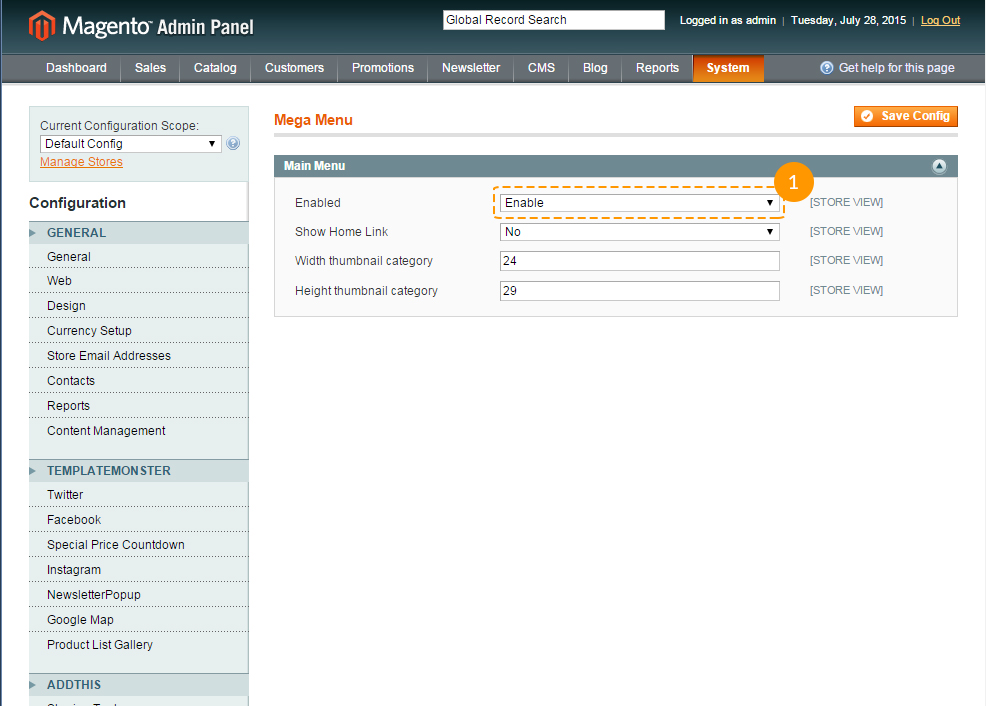
Mega menu
Given module substitutes standard menu with the menu which allows to configure the display of two level subcategories, add static blocks to the dropdown menu, add labels, display products, etc.
MegaMenu is included into the template by default, you can enable/disable it in System > Configuration > MEGAMENU > Mega Menu.- Display of each dropdown menu can be configured on the category settings page, which is located in Catalog > Manage Categories.
-
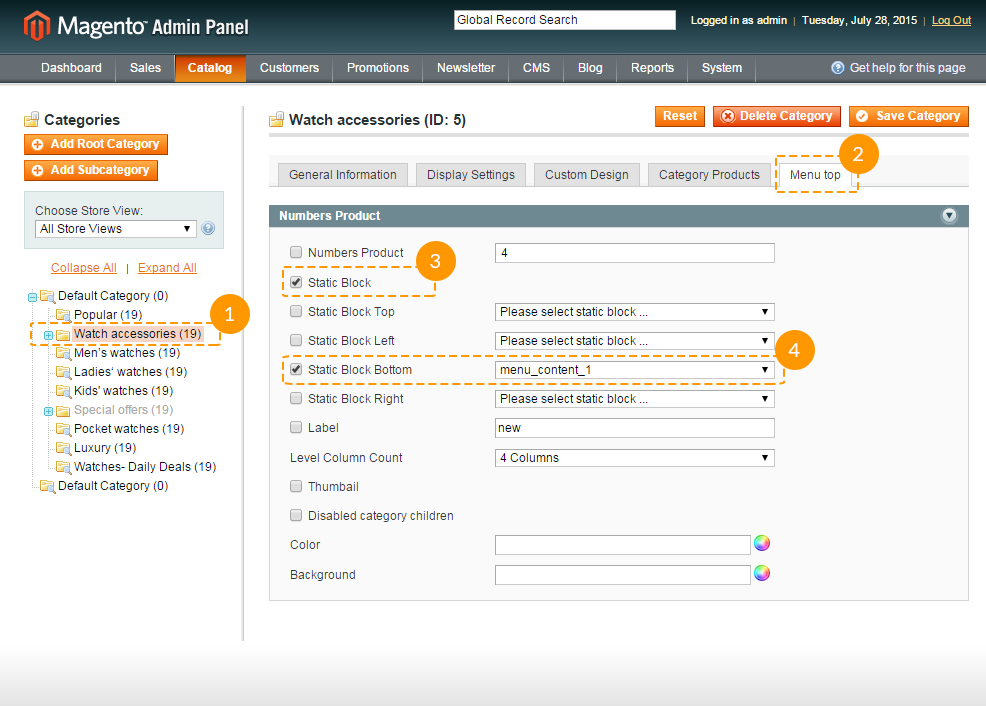
In order to add a static block to a dropdown menu, you need to add a static block in CMS > Static Blocks and once it was created add it to the menu.
-
Module allows to add the label for any category. You can do this in categories menu Catalog > Manage Categories.

-
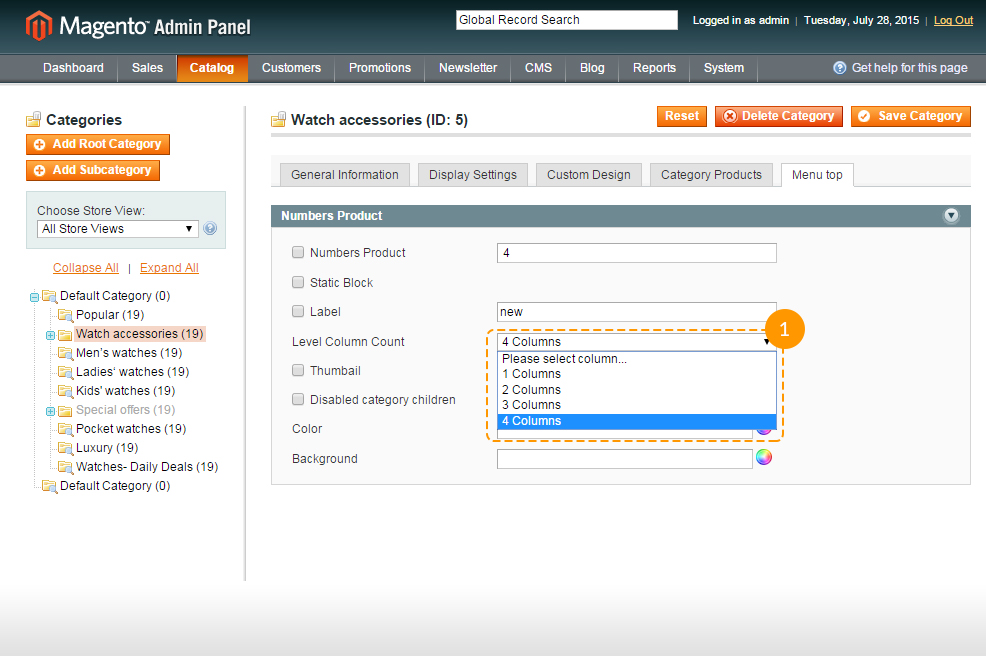
In order to change the number of columns in subcategories you need to change the Level column Count value in the menu Catalog > Manage Categories.
Parallax
Parallax block can be set by adding the part of code to the *.phtml files of your template. In order to add parallax-effect to a certain content block you need:- To add any class for parallax-effect block (e.g., parallax) and add the data-source-url="{{skin url='images/your_images.jpg'}}" attribute.
- To add an image into the images folder skin\frontend\default\themeXXX\images\.
-
To add styles into the skin\frontend\default\themeXXX\css\style.css file:
.parallax { background-image: url(../images/parallax-img.jpg); background-position: 50% 0%; background-repeat: no-repeat; background-size: cover; width: 3500px; left: 50%; margin-left: -1750px; } -
Add to the skin\frontend\default\themeXXX\js\scripts.js file the following code:
jQuery(window).load(function(){
	var isMobile = /Android|webOS|iPhone|iPad|iPod|BlackBerry|IEmobile|Windows Phone|WPDesktop/i.test(navigator.userAgent);
	if(!isMobile) {
	    if(jQuery(".parallax").length){  jQuery(".parallax").cherryFixedParallax({  invert: true,
	    		offset: 300
	    });
	  };
	};
});
Variable invert: true indicates the direction of the parallax effect, and offset: 300 indicates its density.
Background Video
In order to implement the background video, you need to use thejquery.mb.YTPlayer plug-in, which allows to display YouTube video.Video can be added by means of the static block, including the script file jquery.mb.YTPlayer.js and by adding corresponding attributes set for the element which will display the video.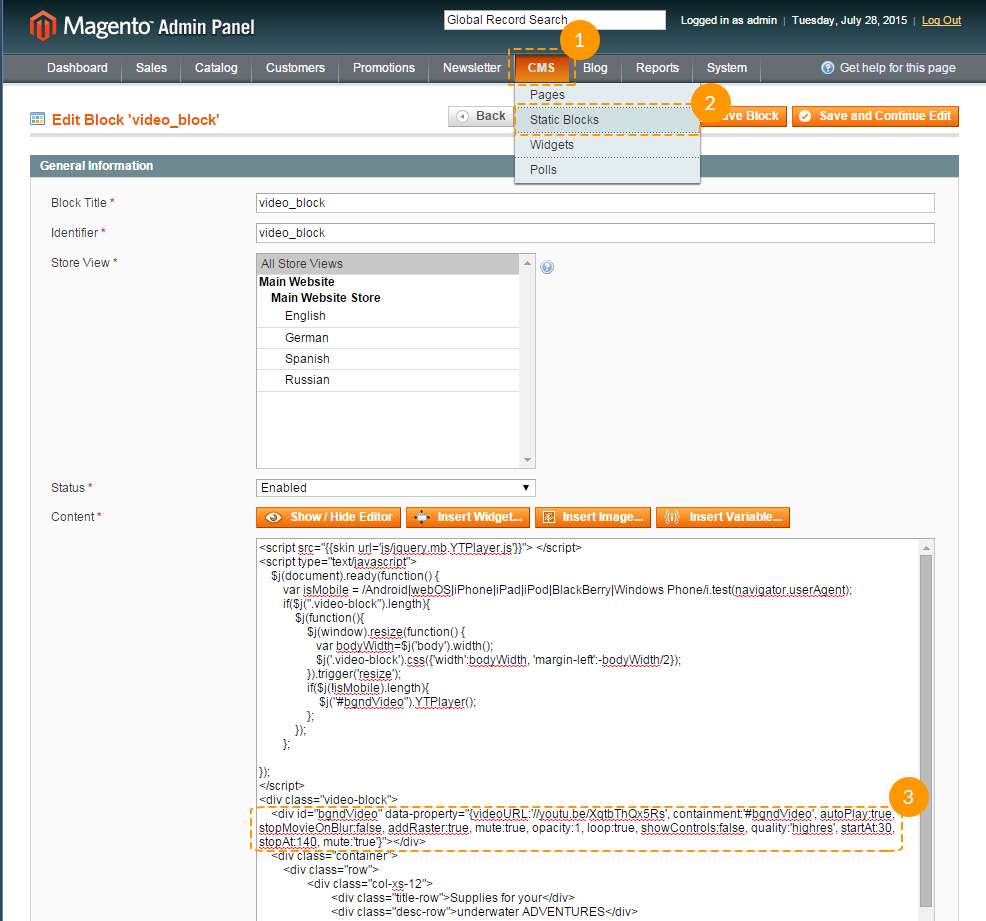
Let’s emphasize basic parameters for the data-property attribute:
| videoURL | - | is a link for the background video you want to display. |
| quality | - | displayed video quality (‘default’ or “small”, “medium”, “large”, “hd720”, “hd1080”, “highres”). |
| containment | - | by default, “self” is used to indicate the block, which will contain the video, if it is initialized in the script. |
| opacity | - | adjusts the video transparency by values from 0 to 1. |
| loop | - | enables/disables video replay (true/false). |
| showControls | - | enables the controls display. |
| mute | - | is a sound cancellation. |
| startAt | - | determines the second from which the video will start. |
| stopAt | - | determines the time at which the video will stop. |
| autoplay | - | enables video autoplay. |
Cookies Policy
Cookies are small text files which websites place on visitors’ computers. They’re typically used to identify the particular visitors and provide them with a better experience. Cookies present a crucial part of many website functions which we take for granted.
For instance, it’s usually the cookies which allow online shops to remember what items you have in your shopping cart. They’re also used to keep you logged into a website or to provide valuable usage statistics and information to the website owners.
If you run a website, it almost certainly uses cookies. Their most likely function is to monitor visitor numbers and behaviours through the tools like Google Analytics. They may also be used to display relevant adverts to visitors. Cookies also power the key parts of your online shopping system.
26th May 2012 - The ICO released a change to the Cookie policy. Starting from that moment "implied consent" is allowed as long as you make it clear where your privacy/cookie policy is.
Following the Cookie Law conditions, you should add the appropriate modules to your website that will display a warning message about the cookies used on your website. We can recommend the following ones: